Things That Go Pump(kin) in the Night
Posted: October 31, 2012 Filed under: desserts | Tags: brownies, chocolate, desserts, eggs, food, pumpkin, recipes, seasonal 4 CommentsHappy Halloween folks! Nothing’s spookier than a treatless house, right? So bake up these chocolate and pumpkin brownies tonight. Truth-be-told, you’re supposed to swirl the layers together, but I guess my swirling skills aren’t up to par because I ended up with distinct layers. I actually think I prefer seeing the stripes of chocolate and pumpkin. More festive that way.
Chocolate-Pumpkin Brownies
– 8 tablespoons (1 stick) of unsalted butter
– 6 oz of bittersweet chocolate, chopped
– 2 cups of flour
– 1 teaspoon of baking powder
– ⅛ teaspoon of cayenne pepper
– ½ teaspoon of salt
– 1 ½ cup of sugar
– 4 large eggs
– 1 tablespoon of vanilla
– 1 ¼ cups of pumpkin puree
– ¼ cup of vegetable oil
– 1 teaspoon of ground cinnamon
– ¼ teaspoon of ground nutmeg
– ½ cup of chopped hazelnuts
Heat your oven to 350º.
Lightly butter a 9×13 baking dish (or similar) and set aside.
Melt the butter and the chocolate in a heatproof bowl set over a pan of simmering water, stirring occasionally until smooth.
In a medium bowl, mix together the flour, baking powder, cayenne pepper and salt. Set aside. In a large mixing bowl, beat the sugar, eggs and vanilla until fluffy and well combined, about 3 to 5 minutes. Beat in the flour mixture a little at time until incorporated.
Pour half of the batter, about 2 cups, into a separate bowl and stir in the chocolate mixture. To the remaining batter, stir in the pumpkin, vegetable oil, cinnamon and nutmeg.
Next, pour half of the chocolate batter into the bottom of the baking dish and use a rubber spatula to smooth out. Top with half of the pumpkin batter, and smooth out with a spatula. Repeat to make one more chocolate and one more pumpkin layer. With a knife or small spatula, gently swirl the 4 layers of batter to create a marbled effect. Top with the chopped hazelnuts. Bake until set, about 40 to 45 minutes. Let cool and then cut into squares.
Punkin Crunch
Posted: October 10, 2012 Filed under: desserts, eggs! | Tags: autumn, cake, desserts, eggs, food, pecans, pumpkin, recipes Leave a commentIt’s been feeling extra fall-like the past week, so it seemed a pumpkin dessert was in order. Like those PB&J blondies I made the week before, this “cake” is incredibly easy. Feel free to call it a cake minus the quotation marks, but it’s actually a cake-crumble hybrid. The bottom is soft and spongy and the pecan crunch topping is well, crunchy and sweet. Combined with rich vanilla bean ice cream, it really packs an autumnal punkin, err, punch.
Pecan Pumpkin Crunch Cake
– 1 15 oz can of pumpkin puree
– 1 cup of heavy cream
– 4 large eggs
– ½ cup of sugar
– ½ cup of brown sugar, divided
– 1 tablespoon of bourbon or whiskey (optional)
– ½ teaspoon ground ginger
– ¼ teaspoon of ground nutmeg
– ½ teaspoon of ground cinnamon, divided
– ¼ teaspoon of salt, divided
– 4 tablespoons (½ stick) of unsalted butter, at room temperature
– 1 ½ cups of roughly chopped pecans
– ¼ cup of flour
– Vanilla ice cream (or whipped cream)
Heat your oven to 350º.
Lightly grease an 8×8 baking pan (or similar) with butter or cooking spray and set aside.
In a large bowl, combine the pumpkin, cream, eggs, sugar, ¼ cup of brown sugar, bourbon, ginger, nutmeg, ¼ teaspoon of cinnamon and ⅛ teaspoon of salt. Whisk until smooth and then pour into the prepared pan.
Cut the softened butter into small pieces and place in a medium bowl. Add the pecans, flour, remaining ¼ cup of brown sugar, ¼ teaspoon of cinnamon and ⅛ teaspoon of salt, and use clean hands to mix it together until combined but still crumbly. Gently scatter the pecan topping over the pumpkin mixture and then bake until the edges are puffed and the center is set, about 60 minutes. Let cool to room temperature. Service with vanilla ice cream.
Note: I kept my pecan pumpkin crunch cake in the fridge because I found I liked it better when it was cold. I never tried heating it up but I bet that would be good too, especially with ice cream.
Midweek Meltdown: Orange Sherbet
Posted: July 25, 2012 Filed under: desserts | Tags: desserts, food, frozen treats, recipes, sherbet, summer food 6 CommentsQuestion of the day: Is it sherbet or sherbert? Discuss that amongst yourselves, and then when you figure it out, make this tasty, easy orange-flavored frozen treat. For those of you wondering, I was going to attempt rainbow sherbet with 2 other flavors. But I didn’t want to spend another hot night trapped in the kitchen. So, there you go. But one is better than none, right?
Orange Sherbet
– ¾ cup of sugar
– ¼ teaspoon of salt
– 2 cups of orange juice
– 1 tablespoon of orange zest
– 1 tablespoon of lime juice
– ½ tablespoon of lime zest
– 1 teaspoon of vanilla extract
– 1 ½ cups of whole milk
In a food processor, combine everything except the milk and process until the sugar is completely dissolved, about 1 minute. Strain the mixture into a bowl (to remove any large pieces of zest) and then whisk in the milk. Cover with plastic wrap and chill in the fridge for at least 1 hour or until cold.
Place the mixture into your ice cream maker and freeze according to the machine’s instructions. Most machines take 20 to 40 minutes to make ice cream. When thick and creamy, eat immediately for soft-serve like sherbet. Or place into a freezer-safe container for a few hours to let it firm up — but let it sit out for a few minutes to soften before eating.
Monday Meltdown: Chocolate Hazelnut Gelato
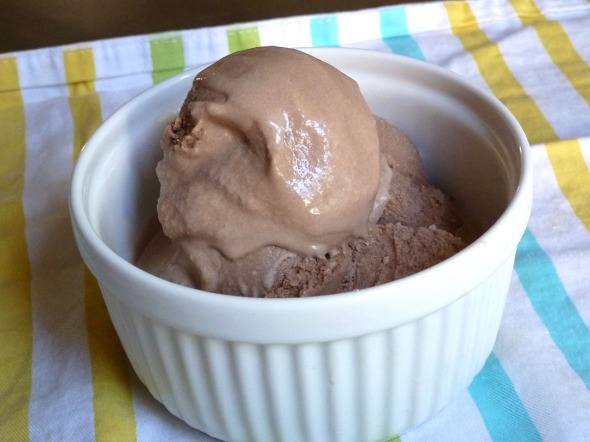
Posted: July 16, 2012 Filed under: desserts, eggs! | Tags: chocolate, desserts, eggs, food, frozen treats, ice cream, recipes, summer food 5 CommentsSummer is in full swing. Because this weekend it was H-O-T. So a frozen treat was a necessary way to beat the heat. This week, it was time for some gelato. Gelato is an Italian creation that’s similar to ice cream but usually softer and creamier. I like it a lot. What do I also like? Nutella, that heavenly chocolate-hazelnut spread. In college I worked at the student newspaper and we spent many nights dipping cookies into Nutella while we prepared the paper for the printer. I know, not that smartest thing to eat in the wee hours of the night, but we were young and silly. And now I’ve discovered that it’s just as great — if not better — as an ingredient in gelato.
Chocolate Hazelnut Gelato
– 2 cups of whole milk
– 1 cup of heavy cream
– ½ cup of sugar plus ¼ cup
– 4 egg yolks
– ½ teaspoon of vanilla extract
– ½ cup of Nutella chocolate-hazelnut spread
– ½ cup of toasted hazelnuts, for topping
In a saucepan, heat the milk, cream and ½ cup of sugar over medium heat. Cook until the sugar dissolves, about 5 minutes.
In a medium bowl, beat together the egg yolks and ¼ cup of sugar until it’s thick and pale yellow, about 4 minutes. Pour a quarter of the warm milk mixture into the eggs and stir, and then add the eggs to the saucepan. (This will help the eggs warm up and not turn into scrambled eggs in the pan.) Cook over low heat, whisking constantly, until the mixture becomes thick and can coat the back of a wooden spoon, about 8 minutes.
Strain the mixture through a mesh strainer into a large bowl. Stir in the vanilla extract and Nutella until it dissolves. Cover with plastic wrap and chill in the refrigerator for at least 1 hour or until cold.
Place the mixture into your ice cream maker and freeze according to the machine’s instructions. Most machines take 20 to 40 minutes to make ice cream. When the gelato is thick and creamy (mine was ready at about 40 minutes), eat immediately for a soft, Frosty-like consistency. Or place into a freezer-safe container for a few hours to let it firm up, and then eat. Since gelato is supposed to be softer than traditional ice cream, if you do decide to eat it later, let it sit out for a few minutes to soften. To give it a little crunch, top it with some toasted chopped hazelnuts.
Monday Meltdown: Triple Berry Sorbet
Posted: July 2, 2012 Filed under: desserts | Tags: berries, desserts, food, frozen treats, recipes, sorbet, summer food 6 CommentsI’m Montana bound for a friend’s wedding so I’m making this short. But before I head off to Big Sky Country it’s time for some Big Berry Flavor. And it’s courtesy of this incredibly simple triple berry sorbet. So go pop your ice cream maker in the freezer, grab some fresh berries and celebrate Independence Day with a sweet and tart frozen treat.
Triple Berry Sorbet
– 1 pint of blueberries
– 1 pint of raspberries
– ½ pint of blackberries
– ¼ cup of sugar
– ¼ cup of honey
– 1 tablespoon of lemon juice
– 1 teaspoon of lemon zest
– Pinch of salt
In a large bowl, add the berries, sugar, honey, lemon juice, lemon zest and salt. Stir to combine then use a potato masher to smash the berries. Place the berry mixture in a blender and blend until smooth. Strain the mixture through a mesh strainer to remove any seeds and large fruit pieces. Cover with plastic wrap and chill in the refrigerator for at least 1 hour or until cold.
Place the mixture into your ice cream maker and freeze according to the machine’s instructions. Most machines take 20 to 40 minutes to make ice cream. When the sorbet is thick (mine was ready at 20 minutes or so), eat immediately. Or place into a freezer-safe container for a few hours to let it firm up, and then eat.
Happy July 4th folks!


