Heat Up
Posted: January 20, 2014 Filed under: sides & soups, veggies | Tags: comfort food, easy, food, meatless monday, minestrone, pasta, recipes, soup, vegetarian 11 CommentsSo far it would seem 2014 is only about one thing. Care to take guess, people? No? Well, I’ll just tell you.
It’s cold. Cold, cold, cold.
But fortunately, that means we’re smack-dab in the middle of soup and grilled cheese season. And you simply can’t have soup and grilled cheese season without a hot bowl of soup. Duh.
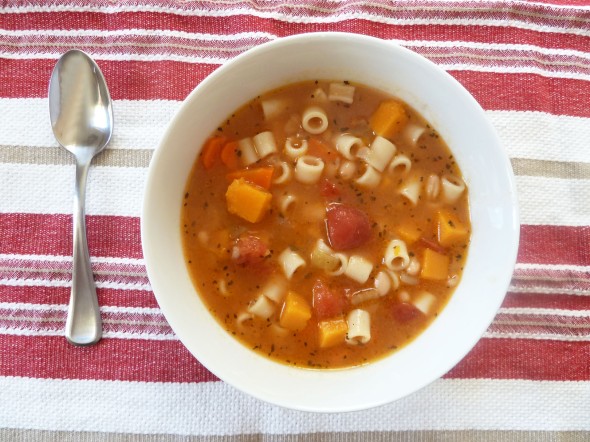
Normally I prefer my grilled cheese with tomato soup, but as any 6 year old will tell you, pretty much any hot bowl of soup is perfect for dunking your sandwich. This hearty minestrone uses a healthy portion of winter vegetables, tomatoes and beans to create a grilled cheese worthy soup – that tastes just as good on its own. It also doesn’t take too long to go from stockpot to soup bowl so you can eat up and heat up in no time.
Winter Minestrone
1 medium onion, chopped
1 14.5 oz can of diced tomatoes with basil, garlic & oregano
1 small butternut squash, cut into small cubes
3 medium carrots, chopped
1 15 oz can of navy beans, rinsed & drained
½ to 3/4 cup of ditalini (or other small pasta)
1/4 cup of grated Parmesan
Salt and pepper
Olive oil
In a large stockpot, heat a few tablespoons of olive oil over medium heat. Add the onion, 3/4 teaspoon of salt and 1/4 teaspoon of pepper. Cook, stirring frequently, until onions are soft, about 8 to 10 minutes.
Add the tomatoes (including juice) and simmer until thickened, about 8 minutes. Add the squash, carrots, beans and 6 cups of water, and bring to a boil. Simmer, stirring occasionally, until the veggies are tender, 20 to 25 minutes. Add the pasta and simmer until tender.
Right before serving, stir in the grated Parmesan. Ladle into bowls and then eat along with a grilled cheese sandwich.
Crumby Scrambled Eggs
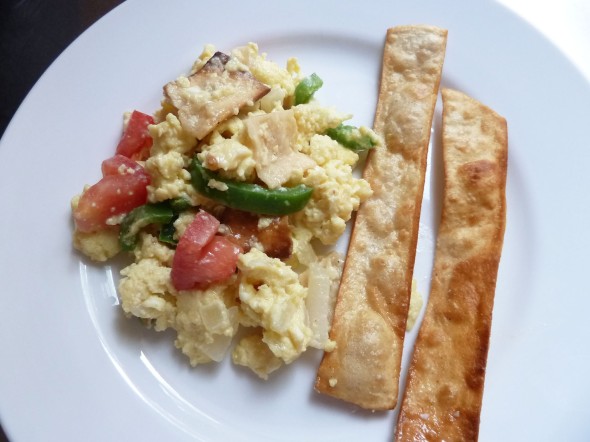
Posted: August 19, 2013 Filed under: eggs!, veggies | Tags: easy, eggs, food, jalapeno, meatless monday, migas, recipes, scrambled, tex-mex, tortillas 3 CommentsNow, don’t go thinking that I’m putting my egg-making skills down today. Because I’m not. It’s crumby, not crummy. Crumby as in crumbs. Crumby as in, “Oh, these fried tortilla crumbs certainly add a lot of texture and flavor to these scrambled eggs.”
What? You’ve never mixed fried tortillas into your scrambled eggs? Then you, my friend, have never had migas, a popular breakfast dish found throughout Texas. Migas translates to crumbs (see!) and the crumbs give the eggs a crunchy texture. You can by all means take the lazy way out and use store-bought tortilla chips. But where is the fun in that? Wouldn’t you rather gently fry your own corn tortilla strips in a nice hot skillet? Then you can season them up with anything you like. There’s nothing crummy about that whatsoever.
Migas, aka Tex-Mex Scrambled Eggs
For the fried tortillas strips:
6 corn tortillas
4 tablespoons of vegetable oil
Sea salt
For the eggs:
½ yellow onion, diced
1 large jalapeno, diced
4 eggs
2 tablespoons of milk
1/4 cup of shredded Monterey Jack cheese
1 plum tomato, diced
Jalapeno (or habanero) hot sauce
Salt and pepper
Salsa (optional)
Cut the corn tortilla into ½ inch strips. Add the oil to a large cast iron skillet and heat on medium-high. Working in batches, add the tortilla strips and lightly fry on both sides until golden brown. Place on a paper towel-lined plate and lightly season with sea salt.
Drain some of the oil from the skillet, lower the heat to medium-low and add the onions and jalapeno. Cook until soft, about 5 minutes. In a bowl, lightly whisk together the eggs and milk, and season to taste salt and pepper plus a few dashes of hot sauce. Add the eggs to the skillet and cook, constantly stirring, until the eggs are the consistency you prefer. Stir in the cheese, and then about 6 strips of torn fried tortillas, and cook for 1 minute until the cheese is melted and the tortilla pieces are slightly soft. Off the heat, stir in the diced tomato. Plate the eggs, garnish with extra tortilla strips and salsa, and eat.
Marinate on This for a While
Posted: August 14, 2013 Filed under: chicken | Tags: chicken, citrus, easy, food, grilled, lime, marinade, orange, recipes, summer food 13 CommentsGet this: It appears that I haven’t posted a chicken recipe in 4 months. For this chicken-obsessed cook, that’s a really (really) long time. Not that I haven’t been making chicken. Oh, because I have. I think I just felt that I was inundating everyone with too many chicken recipes. Although, as I’ve said before—you can never have too many chicken recipes. It’s true. Look it up. Go on, I’ll wait. In the meantime, I’ll be enjoying some grilled chicken thighs. Mmm. They’re so tasty, thanks to an Asian-inspired marinade that’s both salty and citrusy.
Citrus Marinated Chicken Thighs
4 to 6 skin-on bone-in chicken thighs
3 tablespoons of soy sauce
2 tablespoons of vegetable oil
2 cloves of garlic, sliced
1 teaspoon of lime zest
1/4 cup of lime juice
1 teaspoon of orange juice
1/4 cup of orange juice
1 bunch of scallions, diced
1 teaspoon of salt
½ teaspoon of pepper
In a food processor or blender, combine the soy sauce, vegetable oil, garlic, lime zest, lime juice, orange zest, orange juice, scallions, salt and pepper. Reserve about 1/4 cup of the marinade and pour the rest into a large Ziploc bag. Add the chicken thighs, seal and gently toss so the chicken is covered with the marinade. Chill at least 30 minutes.
Heat your grill to medium-high heat. Add the chicken thighs and grill until cooked through, about 5 to 6 minutes on each side. Let rest a few minutes, top with reserved marinade, and eat.
Chip In
Posted: July 15, 2013 Filed under: apps & snacks, veggies | Tags: appetizers, chips, easy, food, meatless monday, recipes, snacks, summer food, vegetarian, zucchini 7 CommentsOkay, for those of you keeping count (and I do hope some of you are), it’s been more than 2 weeks since my last post. Don’t worry, there’s nothing wrong – I’m still making eggs and crafting bad puns. I’ve just taken a little time off to rest and recharge.
A quick recap: I got a bad sunburn. I’ve nearly melted due to the oppressive Boston humidity. I spent some time way (way) up in Maine with my friends. I’ve been testing and re-testing new recipes, some that will definitely find their way onto this blog in the near future, including a cake that just might have done away with my long-standing notion that “I don’t like cake.” But more on that later.
For now, I’m offering something quick and easy and tasty. My old friend zucchini is back for a visit, this time in crispy chip form. These little guys would make a great alternative to potato chips, or even french fries. I thought about concocting a complementary dip for them, but you know what? They don’t need it. They’re that good on their own.
Zucchini Chips
1 large zucchini, cut into 1/4 inch thick slices (the mandolin is your friend)
½ cup of breadcrumbs, plus more if needed
2 teaspoons of Adobo seasoning
1/4 teaspoon of pepper
3 tablespoons of milk
Cooking spray
Heat your oven to 425º.
Combine the breadcrumbs, Adobo seasoning and pepper in a shallow dish. Put the milk in another shallow dish. Dip the zucchini slices in the milk and then dredge in the breadcrumb mixture. Place the slices on a wire rack lightly coated with cooking spray, and then place the rack on a baking sheet. Bake for 25 to 30 minutes, until browned and crisp.
Shrimp on the Cob
Posted: June 27, 2013 Filed under: meat, seafood | Tags: chorizo, corn, easy, food, recipes, Seafood, shrimp, spicy foods, summer food, supper 4 CommentsSo, remember a few weeks ago when I said I wasn’t giving corn any love? I feel bad about that. I’m not saying my guilt lead me to search for a summery recipe that included corn, but I’m not saying that didn’t happen either. But what I am saying is that the combination of shrimp, chorizo and corn is quite wonderful. Sriracha, that glorious hot sauce from the other side of the globe, really kicks this salad up a few notches. And the fact that the whole thing is ready in 4 minutes makes it perfect for a lazy summer night when you don’t feel like cooking but still want something tasty for supper.
Shrimp, Chorizo & Corn Salad
3/4 lb of large shrimp, peeled
1 ½ links of chorizo, sliced
2 cups of corn
1/3 cup of green onions, plus more for garnish
2 tablespoons of Sriracha hot sauce
2 teaspoons of minced garlic
24 grape tomatoes, halved
½ cup of chopped basil, plus more for garnish
2 teaspoons of lemon zest
2 tablespoons of lemon juice
2 tablespoons of olive oil
Salt and pepper
Combine the shrimp, chorizo, corn, green onions, Sriracha, garlic and ½ teaspoon of salt in a bowl. Add the tomatoes and basil and toss to combine.
Heat a large skillet over high heat. Add the olive oil to the pan and swirl to coat. Add the shrimp mixture to the skillet and cook for about 4 minutes, stirring frequently, until the shrimp are cooked through. Off the heat, stir in the lemon zest and lemon juice and season to taste with pepper. Garnish with additional green onions and basil and serve.
Hot Potatoes
Posted: June 25, 2013 Filed under: sides & soups, veggies | Tags: BBQ, comfort food, easy, food, potato salad, potatoes, recipes, side dishes, summer food, vegetarian Leave a commentWho says a summer side dish has to be cold? Not me, even if you’re in the middle of a hot-hot-hot spell, like Boston this week. And this potato salad is proof.
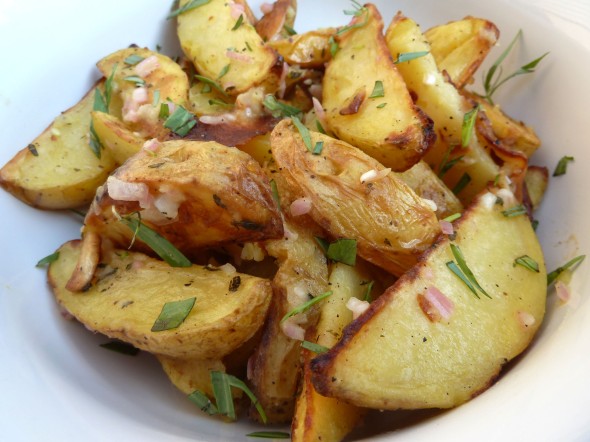
Yukon Gold potatoes – those sweet and creamy and yellow-y gems – are roasted until lightly brown and tender, and then drizzled with a creamy, herb-y vinaigrette. It’s a win-win situation for everyone involved, no matter what the temperature outside.
Roasted Potato Salad with Creamy Dijon Vinaigrette
2 lbs of Yukon gold potatoes, cut into wedges
4 tablespoons of olive oil, divided in half
2 large cloves of garlic, chopped
1 teaspoon of freshly chopped thyme
½ teaspoon of salt plus 1/4 teaspoon
½ teaspoon of pepper plus 1/4 teaspoon
1 ½ teaspoon of white wine vinegar
2 tablespoons of minced shallot
2 teaspoons of Dijon mustard
2 teaspoons of freshly chopped tarragon
Place a large rimmed baking sheet in your oven and heat to 400º.
In a large mixing bowl, combine the potatoes, 2 tablespoons of oil, garlic and thyme and toss to coat. Arrange the potatoes in one layer on the preheated baking sheet and season with ½ teaspoon of salt and ½ teaspoon of pepper. Roast for 30 minutes, turning after 20 minutes, until golden brown and tender.
In a small bowl, whisk together the remaining 2 tablespoons of oil, 1/4 teaspoon of salt, 1/4 teaspoon of pepper, white wine vinegar, shallot and mustard. Toss with the roasted potatoes and garnish with the tarragon. Serve hot or at room temperature.
Spill the Beans
Posted: June 3, 2013 Filed under: sides & soups, veggies | Tags: baked beans, BBQ, beans, easy, food, meatless monday, recipes, side dishes, summer food, vegetarian 7 CommentsQuick: what’s a tasty backyard barbecue side dish that isn’t macaroni, pasta or potato salad?
If you said corn on the cob or cole slaw you’re right – and wrong. What about baked beans, people?? I think everyone always forgets about those. Although maybe not, judging by the size of the baked beans section in the grocery store. Sure, you can go ahead and pick up a can of those “famous family recipe” beans and bring them to your next BBQ. People will commend you for using the can opener and heating something up on the stove.
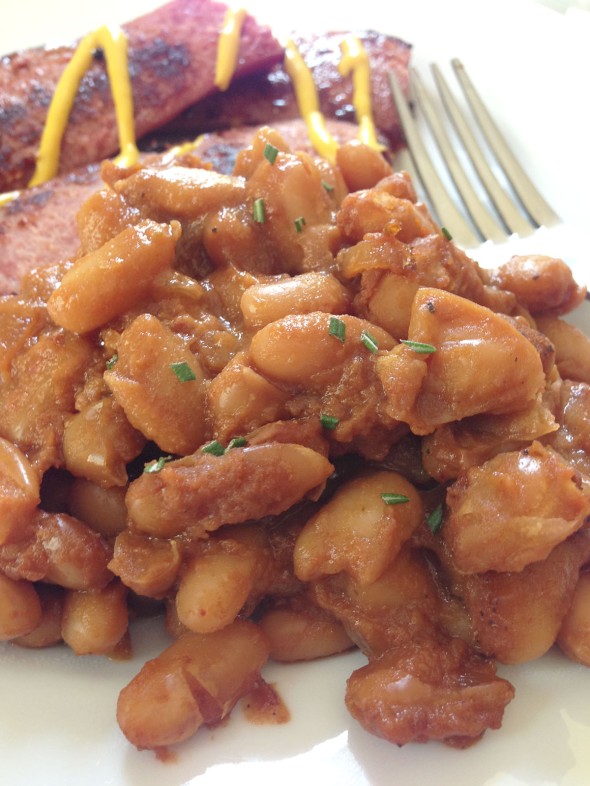
But if you really want to impress people, here’s a little secret: bring a crock of homemade baked beans. It’s just as easy, you still get to practice your can opening skills, and people will be genuinely delighted. The best part is that you get to make your own glorious sauce to cook them in, which here is a combination of ketchup, molasses (for sweetness), Dijon mustard (for tang) and canned chipotles (for heat). This recipe also uses cannellini beans, which are nice hearty beans they won’t turn into mush while baking.
Easy Baked Beans
5 15.5 oz cans of cannellini beans, rinsed & drained
1 small onion, diced
1 cup of ketchup
1 cup of molasses
½ cup of Dijon mustard
1 to 2 canned chipotles in adobo sauce plus some sauce
2 tablespoons of apple cider vinegar
Salt and pepper
Olive oil
Heat your oven to 350º.
In a Dutch oven, heat some a tablespoon of oil over medium heat. Add the onions and cook until soft and slightly translucent. Leave in the pot and set aside.
In a blender, combine the ketchup, molasses, mustard, chipotles, 2 tablespoons of the adobo sauce and the apple cider vinegar. Blend until combined. Adjust flavors according to taste.
Add the beans and the ketchup mixture to the Dutch oven. Stir to combine and season to taste with salt and pepper. Bake uncovered for 30 to 35 minutes until heated throughout and the sides bubble. Serve hot.
Look on the Bright Zide
Posted: May 20, 2013 Filed under: sides & soups, veggies | Tags: easy, food, meatless monday, recipes, side dishes, spicy foods, squash, summer food, vegetarian, zucchini 3 CommentsAlong with beach-appropriate weather, ice cream cones and vacation time, fresh zucchini are one of my favorite things about summer. And while I’ve cooked (and baked with) them many times before, this is one dish that really lets their flavor shine. It’s also ridiculously easy. Like, for realz. The hardest part will be julienning, but if you’ve got a mandolin, that should take no time at all. Just watch your fingers.
Spicy Zucchini Sauté
3 large zucchini, julienned
1 jalapeño, thinly sliced
2 garlic cloves, thinly sliced
½ teaspoon of crushed red pepper flakes
1/4 cup of slivered almonds
Fresh lime juice
Salt and pepper
Olive oil
Place the julienned zucchini in a colander set in the sink. Toss with a teaspoon of salt and let stand for about 10 minutes. Squeeze as much water out of the zucchini as you can – the drier the better.
Meanwhile, toast the almonds in a small skillet over medium heat until lightly browned, about 3 minutes. Let cool.
Heat a few tablespoons of olive oil in a large skillet over medium heat. Add the jalapeño, garlic and red pepper flakes, and cook until fragrant, about 2 minutes. Add the zucchini and sauté, stirring occasionally, until crisp-tender, about 5 minutes. Season with pepper and a splash of lime juice.
200th Post: Ciabatta Breakfast Pizza
Posted: April 22, 2013 Filed under: baked goods, eggs!, meat | Tags: cibatta, easy, eggs, food, pizza, recipes, sausage 24 CommentsWell folks, here we are: Post Number 200. I really can’t believe it. I didn’t think I’d ever make to 100, but then I did. And now there’s 100 posts more. Wow. A gigantic THANKS to everyone who’s egged me on over the past 2+ years.
I’m very happy that this little endeavor of mine has evolved from an egg-centric blog to one that now includes everything – cookies, chicken, baked goods, ice cream, brussels sprouts – that I love to make and eat. This ciabatta breakfast pizza fits in quite nicely. It’s comforting and easy, a little spicy and cheesy, and puts a new spin on a classic dish – French bread pizza. Plus, it’s something you can eat for brunch or supper, which in my book means it’s a truly awesome dish.
Ciabatta Breakfast Pizza
1 demi loaf of ciabatta bread, cut in half lengthwise
2 to 3 links of hot Italian sausage, casings removed
1 tablespoon of tomato paste
4 slices of hot pepper Colby Jack cheese
3 eggs
Garlic powder
Salt and pepper
Olive oil
Scallions, chopped (for garnish)
Heat your oven to 450º.
Heat a large skillet over medium-high heat. Add the sausage, breaking it into pieces, and cook until brown and no traces of pink. Stir in the tomato paste and cook for 2 more minutes.
Place the bottom half of the ciabatta bread on a baking sheet, and put the other half aside for another recipe (or make 2 pizzas). Lightly drizzle the bread with olive oil and a sprinkle of garlic salt. Place the cheese slices on the bread, allowing them to slightly overlap, and then add the cooked sausage on top. Bake for 10 minutes, until the cheese melts and the bread crisps.
While the pizza bakes, fry the eggs. Season with salt and pepper. Gently place the eggs on top of the pizza and garnish with chopped scallion. Cut into pieces and eat.
Thanks again everyone. Here’s to 200 more posts!
